Wednesday, December 31, 2014

Aladdin Pants & Floral Patterns


"Energy is the currency of the universe. When you 'pay' attention to something, you buy that experience. So when you allow your consciousness to focus on something or someone that annoys you, you feed it your energy, and it reciprocates the experience of being annoyed. Be selective in your focus because your attention feeds the energy of it and keeps it alive. Not just within you, but in the collective consciousness as well." - Emily Maroutian

Salut mes beautes intelligentes! 

Happy New Years Eve!!! In addition to celebrating making it into the new year during this very festive period, reflecting on the year is an essential exercise for me, even more so the older I get and the more responsibilities I have. It gives me a chance to understand new things I got to learn about myself, goals I was able to achieve and those I didn't (and why), what and who I'm most thankful for, new skills I may have developed, breakthrough moments, failures, and overall how my perception on life has evolved. As most of you probably know, NYE particularly comes with a lot of excitement, parties and activities(which I'm thoroughly looking forward to!) , but I'm really hoping I get to reflect/plan for the upcoming year, and I hope you do too! Talking about NYE, I still don't know what I'm wearing tonight or tomorrow - oh dear! 


I usually don't opt for harem/Aladdin pants (they were sold as joggers but honestly they look like harem pants to me :D) because I used to think they just didn't fit right. This is the first pair I feel fits perfectly! It's also so comfortable, I could sleep in it. (Yea not happening, but you know what I mean :D). I picked up this floral top at a JC Penney store that closed down not too long ago for $4! It was their last day open and I walked in worried that everything was all gone, until I found this blouse. I love the vintage hint to it, and how well it complements the black pairing.


Photo Credit: Shalom Ikhena


Photo Credit: Shalom Ikhena

Thank you so much for sticking with me all through 2014! Your comments, likes, messages/emails all make my day, and truly warm my heart! I hope to continue to learn more about fashion/style, and hopefully inspire your viewpoint on it in the little way that I can. Voyez-vous l'année prochaine!

Floral Blouse - JC Penney
Aladdin Pants - New Look
Black Clutch - Express
Black Heels - Payless
Earrings - Francesca 
Necklace - H & M

Stay Positive; Stay Mindful 
-Onivie


Monday, December 29, 2014

Coral Roses & Rose-Champagne


"Breathe. Let go. And remind yourself that this very moment is the only one you have for sure. Doing your best at this moment puts you in the best place for the next." - Oprah Winfrey. 

Salut mes beautes intelligentes! 

Hope you all had an amazing Christmas with family/friends. Spending the holiday this year in San Francisco and although I missed having a White Christmas, I have to say I'm absolutely loving the sunshine and not having to layer up as much. It's such a beautiful city with stunning architecture and scenery! The buildings are painted vibrantly with whimsical colors - it feels like a more ideal version of Storybrooke, haha! I almost (almost because it's a crazy expensive city!) wish I lived here. In light of the mild weather, I paired this cropped floral velvet top with a rose-champagne colored slightly pleated skirt to dinner the other day, and kept it simple with nude and black accessories. I'm deeply in love with how full and feminine this skirt is, how well it complements the colors on the cropped top, and this color palette! 

Honestly, it did get a little chilly afterwards, and I didn't have a jacket on (silly me)! I would have gone with a red jacket to really make this look pop, or perhaps a cashmere coat for a more nude look.  :)


Floral Cropped Top - ASOS
Pleated Skirt - H & M
Nude Bone Clutch - Aldo
Black Heels - Payless 

Stay Smart, Stay Beautiful,
-Onivie


Wednesday, December 24, 2014

Holiday & New Years Eve Party Outfit Ideas!!!


Salut mes beautes intelligentes! 

I know it is already almost Christmas (isn't that crazy?!), but here are some last minute ideas for Christmas Eve/Christmas parties all based around my recently developed love for oxblood(see last post)! It's such a rich, elegant color, that I find easily brings sophistication to an outfit.  

Please feel free to remove or/and add to these outfits, they are to serve as a source inspiration and a chance to throw in my personal style. Also, if you don't have enough time to go shopping before Christmas, remember there's always New Years Eve parties to rock these outfits to! :D


Happy Holidays to you and your families, and may your hearts always delight! 

-Onivie


Monday, December 22, 2014

Stripes & Oxblood ft. Kimmy Win

Photo Credit: Kimmy Win

Salut mes beautes intelligentes,

I've been loving warmer tones lately, and everything oxblood (especially nail polishes and lipsticks)! I think the Christmas season also has a lot to do with my gravitation towards this color, but really, where has it been all my life? I find that there are so many patterns and colors that work with this color, and so on one fine sunny Seattle morning, I paired my new favorite skirt with a striped sweater. 

I also got to meet and photograph (and was photographed by) another nerdly beautiful - the intelligent, vibrant and lovely Kimmy Win! It's always great connecting with someone you share similar passions with! (Plus, I adoreee her effortless style, check out her blog here). I've also always admired her photography skills, could barely hold my excitement during this shoot! :)

Photo Credit: Kimmy Win


I would need to steal that scarf sooner of later! Xx


Isn't she lovely? <3

Photo Credit - Kimmy Win


Striped Sweater - Forever 21
Oxblood Skirt - H & M
Necklace - Aldo
Black Envelope Clutch - Express
Black Flats - Just Fab
Mustard Coat - Zara
Scarf - H & M

More on Kimmy's outfit and blog here :)

Stay Smart; Stay Beautiful,
-Onivie

Wednesday, December 10, 2014

Peppermint Sugar Bites & Peppermint Kiss Sugar Cookies


"Christmas waves a magic wand over this world, and behold, everything is softer and more beautiful." - Norman Vincent Peale

Salut mes beautes intelligentes! 

I'm so excited about Christmas this year (as with every other year), it truly is my favorite time of the year! From the lit up streets, to baking holiday treats, hanging ornaments, going on Christmas shopping sprees, spending time with loved ones, listening to Christmas music and most importantly, celebrating the birth of Christ! I could go on and on about why I love this holiday so. However, I have to say I'm missing the snow this winter! There's something about having snow for Christmas, of course this didn't matter growing up in Nigeria, but I think New York spoiled me a little in that regard. What's your favorite Christmas/Holiday tradition?

So, a little back story on this recipe - My friend and I set out to bake a bunch of Peppermint Kiss Sugar Cookies and encountered some.. well.. difficulties but were able to save the day by inventing a brand new recipe - Peppermint Sugar Bites! (which is just as yummy!) When in doubt, use sprinkles! (PS you don't have to be a mint lover to enjoy these recipes). Because this recipe is a little tricky, I included different ways in which you could get a presentable outcome. These were all gotten from a series of unfortunate events, trust me! Now, on to the recipe.. :)

Level/Type: Medium/Holiday Treats
Yield: 36 cookies
Prep Time: 30 minutes
Cook Time: 15 minutes
Decorating/Finishing Time: 30 minutes
Total Time: 1 hr 15 minutes

INGREDIENTS

1 1/2 cups of powdered sugar
1 1/4 cups of margarine (softened butter will do)
1 teaspoon of vanilla extract
1 large egg
3 1/3 cups of all-purpose flour
1 teaspoon of baking powder
1/2 teaspoon of salt
1/2 cup of chopped candy cane flavored Hershey's kisses
Granulated sugar for rolling the cookie balls in
1 pound of unwrapped Candy Cane Hershey Kisses


PROCEDURE

1.
Preheat your oven to 350 degrees F

2.
Chop the Hershey kisses. ( I did this using a table knife, but feel free to go with whatever works better for you)


3.
In a mixing bowl, mix the flour, baking powder and salt.

4. 
In a larger mixing bowl, combine the powdered sugar, butter, egg and vanilla extract and beat until the mix is creamy.

5.
Add the flour mixture, and keep mixing until it is properly blended. Stir in the chopped kisses. Below is what your mix should look like at this stage.


6.
Shape the dough into 3/4 inch balls, roll them in the granulated sugar and align them on your baking sheet.


****
If you're interested in making the Peppermint Sugar Bites, continue on to 7th step. If not, skip to Peppermint Kiss Sugar Cookies section. (If you want to make both of them like I did, save half of the cookie balls for the sugar bites, and second half for the sugar cookies :) )
****


7.
Bake the balls for 12 - 15 minutes, as they bake, unwrap 20 Hershey kisses, and place them in a baking pan (place foil paper in the baking pan before doing this). 

8.
Halfway through the cookies are being done baking (about 5 minutes in), put the pan with the Hershey kisses into the oven and allow the kisses melt (don't leave it in for too long, once the kisses start to melt, take the pan out).

9.
After the cookies are done baking, roll each ball in the pan of melted kisses (this name makes me giggle! Haha), until it is evenly coated, and then pour red sprinkles over the cookie balls. You want to do this step while the cookie balls are still warm, so work fast :D

Anddd you're done! (Place in fridge for 15 minutes before serving)


*****
Peppermint Kiss Sugar Cookies
*****

7.
Now that you have your cookie balls aligned on the baking sheet, slightly press down the middle of each ball. It should look like this

8.
Bake the cookies for 12 - 15 minutes. While it's baking, unwrap Hershey kisses (1 per cookie).

9.
As soon as the cookies are taken out, quickly press a candy cane kiss in the center and put in fridge(I left mine over night, and it was set in the morning). Don't panic if some of them melt in the center, it'll still look cuteee but will lose the kiss shape. 

Andd you're done!


Don't forget to leave a comment below letting me know how this turns out. :)

Bon Appetit,
-Onivie

Friday, December 5, 2014

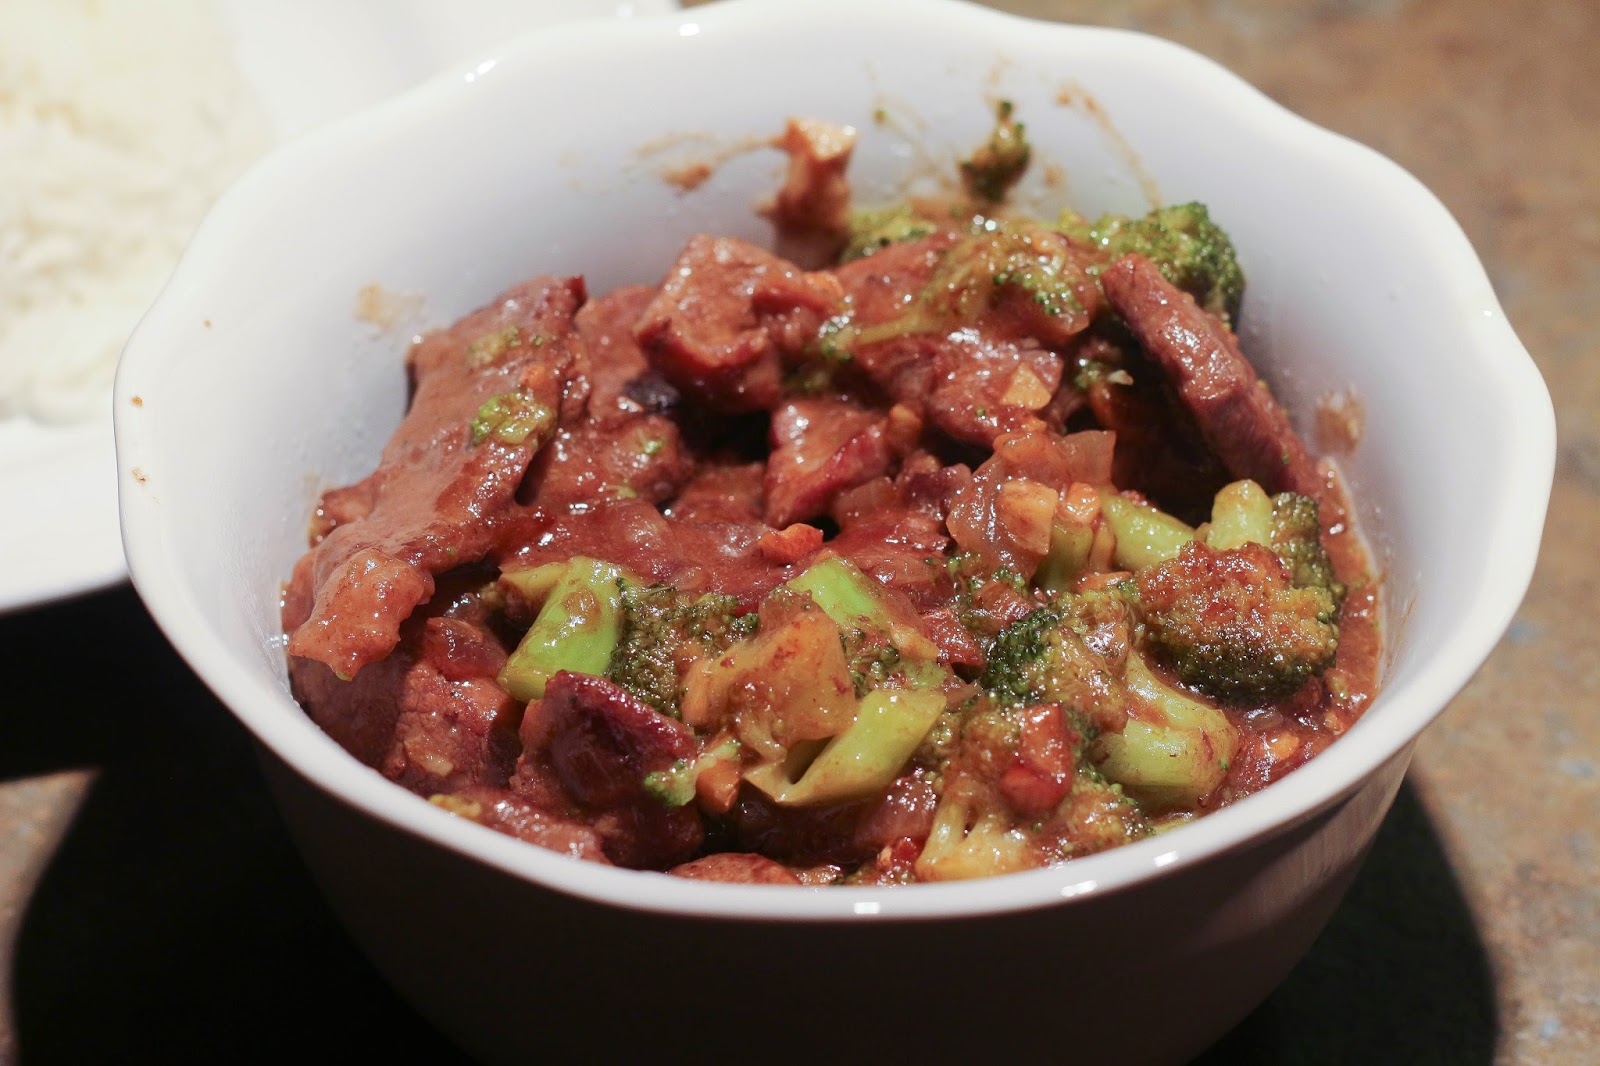
Beef Sauce with Broccoli

Salut mes beautés intelligentes! 

Hope your weekend is off to a great start! The other night I made some beef broccoli with the help of my "assistant chef" (Monsieur Jean-Christophe, as seen in pictures below) for dinner, and it came out so well! (proud moment). Prior to this I had tried out other ways to get the right taste, and a few times failed miserably! However, I think I finally got the right ingredients down, at least for now, before I decide to throw in something new next time(I'll update this post if I do :D ). 

This time around I made the broccoli tender than usual, because I was going for a creamier sauce. :)


Level/Type: Easy/Entree
Yield: 2 Servings
Prep Time: 15 minutes
Cook Time: 15 minutes
Total Time: 25 minutes

INGREDIENTS

2 teaspoons of soy sauce
1/2 teaspoon of corn starch
1/2 teaspoon of sesame oil
1/2 lb of thinly sliced beef sirloin tip steak
2 large cloves of garlic chopped (or to taste if you prefer more garlic)
1 tablespoon of chopped ginger
1 tablespoon of chopped onions
1 head of broccoli 
2 tablespoons of water
1/4 cup of chicken stock 
1 tablespoon of oyster sauce
1 teaspoon of corn starch
1/2 teaspoon of white pepper
2 tablespoons of coconut oil


PROCEDURE

1.
In a small bowl, marinate the beef with soy sauce, corn starch (1/2 teaspoon) and sesame oil. Stir properly to combine.

2.
While the meat is marinating, chop the garlic, onions and ginger, and place them in a separate bowl.

3. 
In another bowl, cut apart the florets of the broccoli into bite-sized pieces.

4.
In a separate bowl, mix the chicken stock, oyster sauce, corn starch (1 teaspoon) and white pepper, and combine properly.

5.
Heat up your sauce pan (or wok if you have one) and add the coconut oil.

6.
When the coconut oil is a little hot, add in your chopped garlic, ginger and onions.

7.
Add in the beef and stir fry until the beef is cooked enough (not completely soft), and then add in the broccoli. Add a little water and cover the sauce pan to allow the steam cook the sauce (cook for five minutes). Note: If you want do not want your broccoli tender, you would have to take out the beef after it has cooked, and steam the broccoli on its own. Once the broccoli is as tender as you want it(2 mins tops), throw in the beef and continue on to the next step. :)

8.
Take off the lid, and add the stock mixture (stir first) into the sauce.

9.
Stir fry until the sauce is slightly thick and and has coated everything evenly. 

I served this with a side of jasmine rice, yum! :)


Please leave a comment below if you try this recipe, orrr you have any suggestions!

Bon Appetit,
-Onivie


Sunday, November 30, 2014

How to Make: Scotch Eggs!

He is no fool who gives what he cannot keep www.inhonorofdesign.com

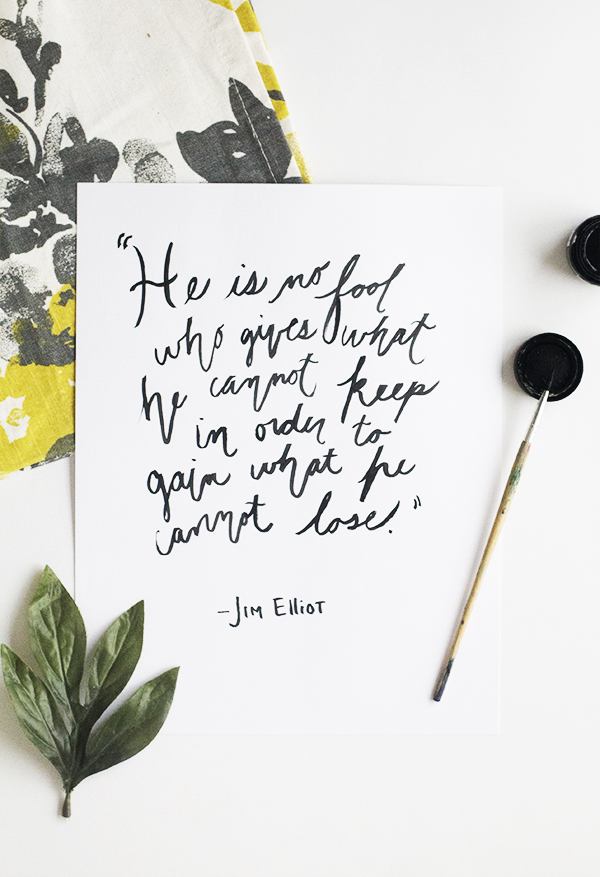
"He is no fool who gives what he cannot keep in order to gain what he cannot lose." - Jim Elliot.

 I had to share this quote I came across the other day. As I journey through faith and building conviction, I find this very relatable. Sometimes, you have to let go to receive more, and I find that in many ways this theory is not far from the truth. :)

Anyways, on to food talk!!!...

I was privileged to spend the Thanksgiving break with family this year. There was plenty to eat and drink, a lot of reminiscing, a lot dancing - pure joy! There's nothing more refreshing that being around people who understand you, and completely route for you!  I decided to try making something I hadn't in a while and most people voted for Scotch Eggs! I figured I shared this easy recipe with mes beautes intelligentes (my nerdly beautifuls), enjoy! :)

Level: Medium
Yield: 8 Scotch Eggs
Prep Time: 30 minutes
Cook Time: 30 minutes
Total Time: 1 hr 

INGREDIENTS
  • 800g Pork Sausage (similar to this, the one I got was already seasoned!)
  • 8 eggs 
  • Breadcrumbs 
  • Flour
  • A bowl of 2 beaten eggs 
PROCEDURE 

1.
Boil all 8 eggs, until they are perfectly hard boiled. (Check out this video if you're not sure how to do this.)

2. 
Flatten the pork sausage to make sort of a patty to surround each egg. This step is a little tricky, so don't expect not to break apart while you do this. One thing I did was patch the area that broken open with extra pork sausage, and it still came out well. :)

3.
Lightly coat each ball with flour.

4.
Dip in the bowl of beaten eggs, and make sure the ball is properly coated.

5.
Roll in the breadcrumbs, also making sure it's coated well!

6.
Deep fry until it's golden. You want to flip it over halfway so all sides fry properly. 

7. (optional)
Bake in preheated oven for 10 mins.

And you're done!


If you try this recipe, please leave a comment below letting me know how it goes! Xx..

Bon Appetit,
-Onivie


Friday, October 24, 2014

Flashback Friday - How to Style a Baby-doll Dress


Salut mes beautes intelligentes!
 
These are from the time I spent a weekend in Philly over the summer, and for some reason, I just never got around posting them up. Anyways, my apologies for them coming late! I know it's already Fall, however, for those nerdly beautifuls in warmer regions and in honour of #FlashBackFridays, here's some inspiration on how to style babydoll dresses :)


I kept it quite simple in anticipation of a long day exploring with my sis. Leave a comment below letting me know what you think! :)

Baby-doll Dress - American Apparel
Yellow Satchel - Accessorize
Brown Oxfords - Payless
Rose-gold Watch - Icing
Necklace - Express
Sunglasses - Aldo

Stay Smart, Stay Beautiful,
-Onivie
 

Wednesday, October 22, 2014

A Chocolatey Nightcap

Salut mes beautés intelligentes!

Last night I attempted making my new favorite chocolate smoothie (special thanks to the smoothie stand at work for inspiring this recipe)! I wasn't hungry enough for an actual dinner, and honestly, I just had cravings! I love that it was so filling and delicious, and I figured I'd share the recipe on here :D


Level: Easy
Yield: Two Glasses 
Total Time: 20 Minutes

INGREDIENTS

9 Dates

2 Overripe Bananas

1 tablespoon of Natural Unsweetened Cocoa Powder

1 cup of Almond Milk

And lastly, ICE CUBES!

PROCEDURE

Step 1:

Take out your blender.

Step 2:

Cut the dates open and remove seeds. Add the dates to your blender.

Step 3:

Cut your bananas into small pieces and add them to the blender.

Step 4:

Add in your almond milk, and then the cocoa powder.

Step 5:

Add in your ice cubes, and blend blend blend!


Bon Appetit,
-Onivie